
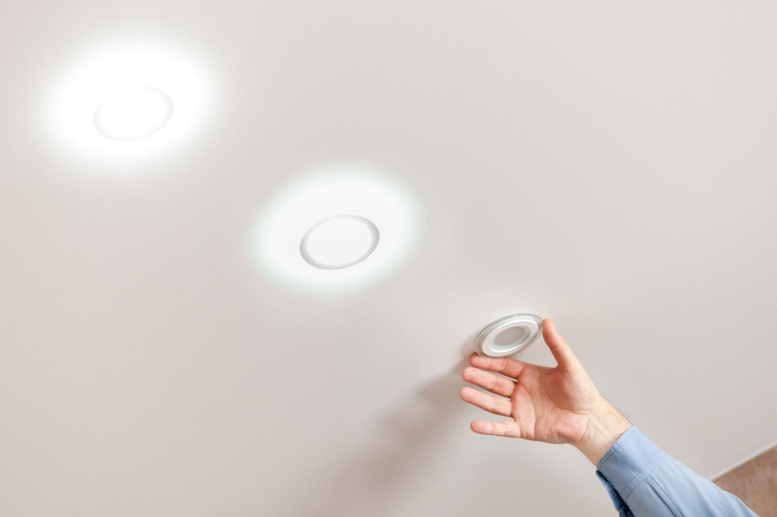
Key Takeaways About Recessed LED Lights
Recessed LED lights use semiconductor diodes and drivers designed to run cooler than older bulbs. This summary is for homeowners and property managers who notice flicker heat or premature dimming and need quick guidance.
- Identify heat buildup by checking trim warmth and lens discoloration.
- Prevent driver failure by ensuring proper ventilation and housing match.
- Avoid dimmer issues by using LED compatible dimmers and switches.
- Spot wiring faults by testing for loose neutrals and high resistance.
- Reduce circuit stress by redistributing loads or adding dedicated runs.
- Plan professional inspections when buzzing burning smells or persistent flicker occur.
Introduction
Recessed LED lights often outlast older bulbs by years, but many homeowners still see early failures. Heat buildup, poor electrical connections, and mismatched housings shorten LED life. Those problems matter because replacing fixtures means disruption and added cost. In houses near Lexington, SC, repeated light failures can reveal hidden wiring or fixture issues.
LEDs use different technology than incandescent or CFL bulbs, so their failure modes differ. Instead of burning out, LEDs usually dim or shift color before they stop working. Excess heat and voltage stress accelerate that decline and can damage the driver or circuit. For properties in Cayce, SC, visible flicker or warm trim rings are common warning signs of stress.
Beyond the lamp itself, the fixture, transformer or driver, and wall switch affect longevity. Improperly rated housings or incompatible dimmers raise operating temperatures and electrical wear. Homeowners notice problems as buzzing, intermittent flicker, or rapid brightness loss. Those symptoms help point to the real cause rather than blaming the LED alone.
Addressing the root cause preserves the longer lifespan LEDs promise and reduces repeat visits from electricians. A focused inspection looks at housing ventilation, driver temperature, wiring connections, and dimmer compatibility. Catching issues early prevents heat damage and extends dependable recessed lighting for years. If you see persistent flicker or warmth, contact a licensed electrician to diagnose and confirm the problem safely.
How Recessed LED Lights Work and Why They Last
How recessed LED lights work: they use semiconductor diodes that emit light when current passes through, rather than heating a filament.
- LED chips produce light directly from electricity.
- A driver converts house voltage to a steady current.
- Heat sinks move heat away from the diode.
- The housing affects airflow and heat transfer.
LEDs last longer because they convert more electricity to light and less to heat, reducing wear on components. Homeowners often ask if LEDs fail suddenly, usually they dim or change color before they stop working. A professional will inspect the driver, check voltage at the fixture, and measure driver temperature to confirm aging. In Lexington, SC, visible color shift or steady dimming often points to driver or thermal problems rather than the LED chip alone.
The driver and heat management determine most of the usable life for recessed LEDs, not just the diode. When a driver supplies unstable voltage, homeowners may notice flicker or buzzing that signals electrical stress. An electrician will open the trim, test the circuit with a voltage reading, and photograph connections for a written report. For properties in Cayce, SC, poor ventilation inside the housing commonly raises driver temperature and shortens service life.
Energy Efficiency Reduces Heat and Component Wear
LED efficiency means less electrical energy becomes heat, which protects nearby components and extends service life. Lower operating temperature slows chemical and mechanical changes inside the driver and solder joints. That reduced stress also limits color shift and lumen depreciation over years of normal use. In many homes, cooler-running fixtures mean fewer failures and longer intervals between replacements.
Recessed LED lights typically rely on heat sinks and housing airflow to move residual heat away from sensitive parts. If heat cannot leave the fixture, the driver runs hotter and ages faster than expected. Properly designed heat sinks keep junction temperatures lower, which preserves diode output and color stability. Technicians check junction and driver temperatures to confirm if heat is the root cause of decline.
Energy-efficient drivers supply steady current while producing less internal heat than older designs, reducing thermal cycling that weakens components. When drivers operate near their rated temperature limits, capacitor life shortens and output can become unstable. An electrician will perform a voltage reading and inspect the driver enclosure for heat discoloration or bulging parts to diagnose this. Addressing a hot driver often fixes flicker and prevents nuisance failures.
Homeowners in Lexington, SC and Cayce, SC notice the benefits of cooler recessed fixtures in comfort and reliability during long evening use. A common situation shows dimming or slight color change only when multiple fixtures run together, which points to shared thermal or electrical stress. A professional will remove the trim, measure driver temperature, and test the circuit under load to confirm the diagnosis. Fixes range from swapping to a lower-heat driver, improving housing ventilation, or replacing mismatched dimmers to reduce stress.
Driver and Circuit Factors That Shorten Lifespan
Drivers that supply inconsistent current accelerate component wear and cause early failures in recessed LED lights. Poor regulation lets voltage spikes stress LEDs and electrolytic capacitors inside the driver. An electrician would check with a voltage reading and continuity test to confirm unstable supply. In Lexington, SC homeowners often report flicker linked to loose neutrals or older service panels that create these symptoms.
Compatibility issues between dimmers and LED drivers produce audible buzzing and intermittent operation in many installations. Mechanical and trailing-edge dimmers designed for incandescent loads can misread driver electronics and create voltage ripple. A professional will open the trim, test the dimmer with a multimeter, and swap in a compatible LED-rated dimmer to confirm the mismatch. Replacing an incompatible dimmer often stops the buzzing and restores smooth dimming.
Poor connections at the junction box or within the fixture raise resistance and create local heating that shortens driver life. Loose wire nuts or corroded splices show as warm trim rings, intermittent power, or burning smells during use. Technicians inspect connections, tighten or reterminate conductors, and record voltage drop measurements under load to diagnose the problem. Fixing high-resistance joints reduces heat and prevents repeated driver failures.
Shared circuits and overloading can also stress drivers when multiple recessed LED lights run together on a single run. Voltage sag under load increases thermal stress inside each driver and accelerates capacitor aging. An electrician will measure circuit voltage while fixtures are on, check breaker load, and recommend redistribution or a dedicated run if needed. For properties in Cayce, SC, balancing loads often resolves flicker and extends fixture lifespan.
Fixture Design and Installation Effects on Durability
Fixture trim, housing material, and mounting method affect how well recessed LED lights shed residual heat and stay sealed against dust. A tight trim that traps heat raises junction temperature and accelerates driver wear over time. Metal housings conduct heat away better than plastic in many designs, improving thermal transfer to the ceiling cavity. Inspecting the trim fit and housing material helps identify fixtures prone to overheating before failure occurs.
- Check that trims have clearance for airflow.
- Confirm housings match the fixture's thermal rating.
- Ensure trims are not pushing on the driver.
- Replace damaged gaskets or seals promptly.
- Keep insulation away from non-IC housings.
Incorrect mounting height or contact with insulation creates thermal hotspots that shorten component life in recessed LED lights. An electrician will remove the trim and measure driver temperature during operation to locate hotspots. They also check for physical contact between insulation and the housing that the fixture is not rated to handle. Resolving clearance issues often prevents repeated driver and diode stress.
Poorly designed trims or reflectors can concentrate light and heat onto the LED lens, causing localized degradation and visible color shift. Technicians inspect for discoloration or brittle plastics around the LED which signal excessive heat exposure. Swapping to trims with better thermal paths or different reflector geometry reduces that concentrated heating. For homeowners in Lexington, SC, visible lens yellowing usually prompts a thermal and visual inspection.
Wiring assembly inside the housing and the choice of junction box affect long-term reliability of recessed LED lights. Loose staples, crowded conductors, or poorly rated connectors increase resistance and heating that affect the driver. A professional confirms secure terminations, performs a continuity test, and photographs connections for documentation. In Cayce, SC homes where ceilings have been remodeled, checking box fill and conductor routing helps prevent future failures.
Common Warning Signs of Failing Recessed Fixtures
Buzzing or a faint electrical odor while recessed LED lights run often signals stressed components or loose connections inside the housing. Homeowners might notice the sound increases when multiple fixtures are on, which suggests a shared circuit or high-resistance splice. A professional would open the trim, test the circuit with a voltage reading, and inspect the junction box for loose wire nuts. If the odor persists, stop using the circuit and contact a licensed electrician for a safe diagnosis.
Persistent flicker that does not respond to bulb replacement points to driver aging, dimmer mismatch, or intermittent neutral connections rather than the LED chip. To confirm the cause, an electrician will remove the trim, perform a continuity test, and measure voltage at the driver under load. Photographs of the wiring and a written report help document intermittent faults that only appear when fixtures heat up. In many cases, replacing a failing driver or installing an LED-compatible dimmer stops the flicker.
Visible discoloration around the trim or yellowing of the lens indicates prolonged heat exposure and material breakdown inside recessed LED lights. A technician will inspect the reflector and driver for heat staining and use an infrared camera or a temperature probe to map hotspots. They also check that insulation clearance meets the fixture rating and confirm the housing material is intact. For homes in Lexington, SC this discoloration often prompts immediate thermal testing to prevent further damage.
Rapid lumen drop or noticeable color shift in one or more fixtures often appears before total failure and suggests thermal or electrical stress on the diode or driver. An electrician will run the fixtures under load while taking temperature readings and noting any voltage sag on the circuit. They may also test switch and dimmer compatibility and look for shared neutrals producing intermittent behavior. For properties in Cayce, SC, documenting these readings helps prioritize driver replacement or rewiring to restore dependable light output.
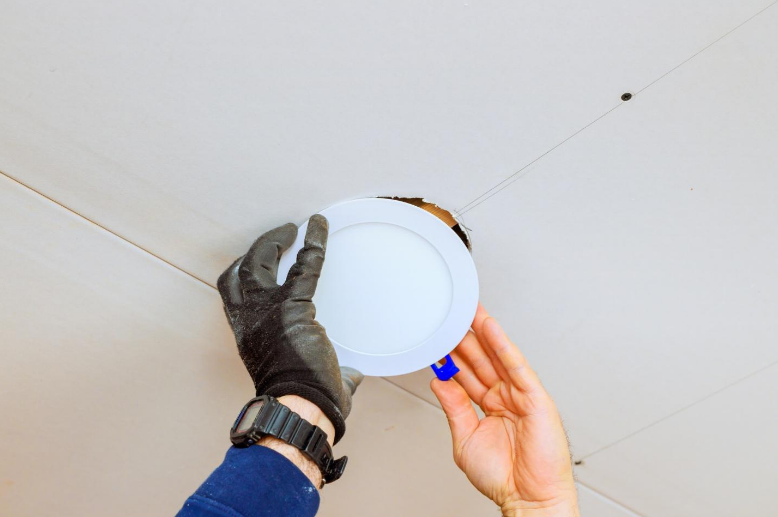
Photo from iStock - Credit: photovs
When to Call a Professional for Recessed LED Lights
If you notice repeated flicker or a burning smell from recessed LED lights despite replacing drivers, call a professional to inspect wiring and connections. A licensed electrician will access the junction box, perform a continuity test, and take voltage readings under load to find intermittent faults. They also check for high-resistance terminations and thermal damage that home testing cannot safely reveal. Stopping use and scheduling an inspection reduces risk while a technician documents findings for next steps.
When several fixtures on the same circuit dim together or drop in brightness suddenly, a pro can assess circuit load and breaker performance. The electrician will measure circuit voltage during operation and look for shared neutrals or overloaded runs that cause voltage sag. They may recommend redistributing loads or adding a dedicated run to protect recessed LED lights and drivers from repeated stress. Correcting circuit issues prevents recurring failures and uneven lighting across multiple rooms.
Visible heat damage, melted trim, or lens yellowing requires immediate professional evaluation to rule out insulation contact or fixture misrating. A technician will remove the trim, inspect housing clearances, and use a temperature probe or infrared camera to locate hotspots accurately. They will also verify the fixture's IC rating and confirm that insulation placement complies with the fixture specification. If the housing is improperly rated, replacement or relocation of the fixture prevents future heat-related degradation.
If dimming behaves poorly or buzzing continues after bulb replacement, a professional can test dimmer-driver compatibility and swap components on-site. The electrician will test the dimmer with a multimeter and may temporarily install an LED-rated dimmer to confirm the cause. They will also examine the switch loop, verify grounding, and document any loose neutrals or worn breakers. After diagnosis, the tech provides clear options like replacing the dimmer, driver, or performing targeted rewiring.
Maintenance Steps Homeowners Can Do Safely
Start with power off and a circuit breaker turned off before touching any trim or wiring to reduce shock risk. Use a non-contact voltage tester to confirm power is dead at the trim before removing the fixture. Inspect visible wiring for discoloration, brittle insulation, or loose wire nuts without disturbing sealed connections. If you find heat damage or melted insulation, stop and call a licensed electrician for a safe evaluation.
- Dust trims and lenses with a soft, dry cloth.
- Vacuum loose dust from housings using a brush attachment.
- Check that vents and openings are not blocked by insulation.
- Tighten visible screws on trims and retainers gently.
Clean reflectors and lenses carefully to preserve light output and color consistency over time. Remove dust that reduces lumen output and check the lens for hairline cracks or yellowing signs. Take photos of any suspect damage to show a professional for an informed diagnosis. Reinstall trims so they sit flush and do not press on the driver or lens when finished.
Perform simple switch and dimmer checks by toggling switches and observing behavior under load to spot intermittent faults. If flicker appears only when dimmed, swap to a known LED-compatible dimmer or remove the dimmer temporarily for testing. Record voltage readings during your checks if you have a multimeter and know how to use it safely. If readings show large swings or unstable values, contact a licensed electrician for definitive testing and repair.
Inspect attic or ceiling access points for insulation contact and confirm clearances match fixture markings to avoid thermal stress. For homeowners in Lexington, SC and Cayce, SC, note any repeat problems that appear after insulation work or remodels. Keep a simple log of which fixtures show issues, when they occur, and under what conditions to help a professional diagnose patterns. This documentation speeds accurate diagnosis and leads to targeted repairs that preserve recessed LED lights longevity.
Upgrades and Best Practices to Extend Service Life
Upgrade to high-quality LED drivers with higher temperature ratings to extend service life and reduce failures. A professional can replace drivers with models that match the fixture's thermal profile and maintain steady current. They will run a voltage reading and test under load to confirm the new driver solves flicker or dimming issues. For durable results, insist on drivers with surge protection and documented operating-temperature limits.
Switch to LED-rated dimmers and compatible switches to avoid electrical stress that shortens component life. A pro will test the existing dimmer with a multimeter and swap in a compatible unit to confirm smooth operation. Rewiring a switch loop or upgrading to a dedicated circuit reduces voltage sag when many recessed LED lights run together. These changes often stop buzzing and intermittent behavior without replacing trim or housings.
Improve fixture ventilation and use trims that provide clearance from insulation to lower junction temperatures and slow degradation. Technicians can replace closed trims with vented designs or relocate housings slightly to allow airflow when feasible. They may use an infrared camera to map hotspots and verify that the upgrade yields cooler driver and diode temperatures. After upgrades, professionals document temperature readings and provide a written report for homeowner records.
When repeated failures occur, consider replacing aging housings and junction boxes that trap heat or limit conductor routing. An electrician inspects box fill, conductor routing, and connector type, then recommends installing larger boxes or metal housings that dissipate heat better. For homeowners in Lexington, SC this approach often reveals cramped wiring that accelerates driver wear during summer use. Replacing the housing and correcting terminations helps preserve recessed LED lights and reduces future service calls.
For properties in Cayce, SC prioritize surge protection at the panel and point-of-use protection for sensitive drivers to guard against transient voltage spikes. A pro can install a surge device at the service panel and add localized protection for circuits feeding LED fixtures. They will verify grounding and take voltage readings before and after installation to confirm reduced spike exposure. These measures help maintain stable operation and extend overall fixture lifespan.