
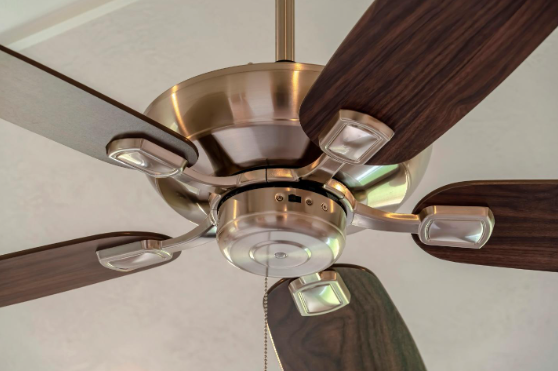
Key Takeaways About Ceiling Fan Wiring
Ceiling fan wiring means the conductors and connections that power a ceiling fan and its light kit. This summary is for homeowners and property managers who need to spot risks during installation or when symptoms appear.
- Identify undersized boxes and improper mounting before installation.
- Prevent loose terminals and poor grounding with proper torque.
- Avoid shared neutrals and incorrect multiway switch wiring configurations.
- Spot blade imbalance signs such as wobble thumping or canopy movement.
- Reduce vibration damage by securing braces and using fan rated hardware.
- Plan professional inspection when you smell burning or see scorch marks.
Introduction
Ceiling fan wiring mistakes can cause noisy wobble, loose fixtures, and unsafe switch setups that risk shocks or tripped breakers. Homeowners often miss one key item such as an undersized box or an unsupported fan brace. When a blade is out of balance you hear rhythmical wobble and see fast wear on the motor. For properties in Blythewood, SC these problems can worsen over time without proper inspection.
Electrical boxes must match the fan weight and mounting method to prevent sagging and wiring stress. Loose screws, wrong box ratings, or missing grounding conductors often show up during visual checks. Fans mounted to standard light boxes can pull free if they lack a fan-rated support brace. In Gilbert, SC homes, older ceilings are a common context for these hidden risks.
Balanced blades and secure supports reduce noise and extend motor life by keeping load and vibration within design limits. Unbalanced blades create wobble that wears bearings and shorts motor life, and can loosen wire connections. A loose canopy or worn hanger ball often points to a support problem under the ceiling. Avoiding these issues keeps fixtures safer and quieter for years.
Switch wiring mistakes include shared neutrals, incorrect multi-switch setups, and missing grounds that raise safety concerns. Visible symptoms include flickering lights, switches that control unexpected loads, and breakers that trip oddly. A professional can diagnose these signs with voltage readings and a continuity test to confirm wiring paths. Contact Mister Sparky of Columbia, SC to schedule a ceiling fan wiring inspection or service if you notice these problems.
Understanding Ceiling Fan Wiring How It Works and Risks
Ceiling fan wiring is the set of electrical conductors and connections that power a fan and its light kit. A clear symptom of wiring problems is lights flickering or switches that control the wrong device, and homeowners often ask if the fan or the circuit is at fault. Wiring involves hot, neutral, and grounding conductors, plus any switched legs for fan speed or light control. Properly routed conductors reduce heat buildup and prevent loose connections that start arcing or trips.
- Hot conductor delivers power to the fan motor.
- Neutral returns current to the panel.
- Grounding conductor provides a fault path.
- Switched leg controls fan or light separately.
Combine visible clues with basic tests to narrow causes before opening the canopy. A continuity test confirms a switch or conductor path, while voltage readings at the fan box show whether you have a solid neutral or a shared neutral issue. A professional will also inspect the switch loop and any multiway wiring to ensure switches match the intended control scheme. These checks answer whether a rewiring, new switch, or just a tightened connection will fix the problem.
Improper wiring increases fire and shock risks when connections overheat or grounds are missing. Loose wire nuts, undersized conductors, or shared neutrals create high-resistance points that show heat or discoloration inside the box. If you smell burning plastic or see melted insulation, shut off the circuit and call a professional for immediate inspection. For homes near Blythewood, SC, quick response limits further electrical damage.
A professional diagnosis includes visual inspection, voltage readings, and load checks under normal operating conditions. They will open the junction box, verify grounding continuity, and trace switched legs with a multimeter or continuity tester. In Gilbert, SC properties a technician will document findings and recommend repairs or replacement based on observed wiring and support condition.
Proper Electrical Box Ratings and Installation Guidance
Choose a UL-rated electrical box for the fan's weight and the mounting type to avoid stress on wiring and supports. A metal fan-rated box gives a solid anchor and allows secure grounding conductor attachment points for safe continuity. Inspect the box opening for sharp edges that can nick insulation during installation and replace or file them smooth before pulling conductors. If the canopy sits unevenly, confirm the box sits flush with the ceiling surface and is centered over the electrical opening.
When replacing an existing fixture, verify the box's internal volume matches the conductor count and splices you plan to make. Overfilled boxes raise heat and short-circuit risks, so move extra splices into a larger fan-rated box or use approved pigtails. Look for a labeled fan box or one stamped for ceiling fan support which often includes threaded holes for secure mounting. If you see paint-covered markings or missing labels, assume the box may not meet current fan ratings and inspect further.
Grounding must be continuous between the fan, box, and branch-circuit grounding conductor to provide a reliable fault path. A qualified electrician can verify that the metal box and hanger brackets are properly bonded and that the grounding connections meet applicable electrical requirements. Professional ceiling fan installation services can help ensure the mounting box, wiring, and grounding connections are suitable for safe operation.
Professionals diagnose box inadequacy by checking box rating stamps, measuring box depth, and doing a poke-and-pull test on mounting hardware under load. They will also inspect insulation condition on hot and neutral conductors and perform a voltage reading with the fan connected to confirm stable supply. In a common situation, a homeowner may see a sagging canopy and hear intermittent buzzing, a technician would check the box mount, tighten connections, and record test readings.
Secure Support Methods for Heavy Ceiling Fans
Heavy fans need support that transfers weight to the ceiling structure rather than the electrical box alone. Install a metal crossbar or fan-rated brace between ceiling joists to carry load and reduce motion. Confirm the brace fits snugly and seats against joist faces to avoid compression or shifting under continuous vibration. A properly seated brace keeps the hanger ball aligned and prevents canopy rotation that stresses wiring and connections.
Use a threaded downrod or rated mounting strap that matches the fan's hanging method and weight specifications. Threaded hangers and locknuts resist loosening better than smooth bolts when the fan runs at high speed. Inspect the hanger for visible wear, corrosion, or stripped threads which indicate replacement before completing the wiring. Secure mechanical fasteners tightly to maintain grounding continuity and prevent the fan from pulling on conductors during operation.
When a fan uses a joist-mounted brace, verify the mounting screws engage solid wood and not just drywall or plaster. If the brace sits on furring strips or damaged material, relocate the support to sound lumber to prevent pull-through. A professional would confirm load transfer by applying a hand force test and checking for movement at the canopy while monitoring wiring stress points.
After the mechanical support is secure, route conductors so they avoid pinch points and sharp edges inside the canopy and box. Leave serviceable conductor lengths for future maintenance and use approved strain reliefs where conductors pass through metal parts. A technician diagnoses support-related wiring faults by visual inspection, continuity testing of the grounding conductor, and a gentle tug test on the canopy to reveal hidden looseness.
Balancing Fan Blades: Why It Happens and When to Fix
Loose or warped blades often cause wobble because weight shifts around the motor's center, creating rhythmic vibration homeowners notice. Check for visible warping, dents, or missing balancing weights glued to blade edges. A blade that looks fine can still be heavy on one side from moisture absorption or manufacturing tolerance. If you hear a thumping at certain speeds, record when it happens and note which speed causes the noise.
- Inspect blades for chips and warps.
- Check that blade brackets seat evenly.
- Measure blade pitch visually for consistency.
- Replace missing balancing weights when needed.
Professionals diagnose imbalance by running the fan at several speeds while observing wobble amplitude and canopy movement. They will use a simple balancing kit or temporary weights to identify which blade needs correction. A technician also checks the blade brackets and screws for looseness that mimics imbalance symptoms. For properties in Blythewood, SC, homeowners often spot wobble during humid months when boards can swell slightly.
Minor imbalance fixes include tightening bracket screws, swapping blade positions, or adding clip-on counterweights to match mass distribution. If blades are cracked, replace the whole blade rather than trying to rebalance a damaged piece. A professional inspects the motor bearings and hanger ball if wobble persists after blade-level fixes. In Gilbert, SC homes with older fans, bearing wear can show as wobble that worsens with run time.
When imbalance causes stress on the fan's wiring, you might see loose wire nuts or discoloration inside the canopy from vibration and heat. A technician will open the canopy, check terminal tightness, and perform a continuity test on the grounding conductor to confirm safe connections. If wires appear chafed or insulation is damaged, they recommend stopping use and scheduling repair.
Safe Switch Wiring Options for Multiway Controls
Multiway switch setups let a fan and light operate from two or more locations, but wiring must keep switched conductors separate from shared neutrals. A common safe method uses a 3-conductor cable with separate red and black switched hots and a white neutral, each landed on the correct terminal. A professional checks continuity and voltage on each conductor before connecting to confirm no shared neutral or miswired traveler exists. If you smell burn or see melted insulation, turn off the circuit and call for an inspection immediately.
Another reliable option is to install a fan control module in the fan canopy that accepts a single switched hot and a neutral, while the wall switches send low-voltage signals. This reduces multi-conductor runs through walls and limits live conductors at remote switches, improving safety and simplifying tracing. A technician will confirm the module's compatibility with the fan motor and light kit and test load switching under normal speeds.
When converting a two-switch setup to multiway dimming or speed control, use devices designed for motor loads and for multi-location control to avoid overheating. Dimmers rated only for lighting can overheat or cause motor humming when used on fan circuits, creating premature switch failure or noise. A pro diagnoses the correct device by reading the switch label, measuring current draw at the fan, and confirming the device's motor rating with a multimeter and load test.
To confirm a safe final wiring, an electrician performs continuity tests, verifies grounding continuity to the fan mounting, and runs the fan through all speeds while monitoring connections. They will also check that the junction box has proper volume for all splices and that wire nuts are sized correctly for conductor count. In a common situation, a homeowner reports lights controlled from two switches behaving inconsistently, a technician traces the travelers, measures voltages at each switch, and provides a written repair plan.
Common DIY Wiring Mistakes and How to Avoid Them
One common mistake is reusing existing cable without checking conductor size and insulation condition before connecting a new fan. Old 14-gauge wiring on a 20-amp circuit or brittle insulation from age raises heat and trip risks quickly. Inspect conductors visually and confirm gauge with a wire gauge tool or by checking breaker rating prior to final connections. If you see melted insulation or discolored wires, stop and arrange a professional inspection immediately.
Another error is routing conductors where they rub against sharp metal edges inside the canopy and box during operation. Vibration from the fan can abrade insulation over time and expose live conductors, increasing shock and arc risks. Use approved strain reliefs and grommets where wires pass through holes to prevent chafing and keep service loops for future maintenance. A technician will also look for pinched wires and repair any damaged insulation before reassembly.
Some DIYers underestimate the importance of secure terminal connections and torque on screw terminals when landing fan leads. Loose terminals can cause intermittent operation, arcing, and heat buildup that damages the fan or wiring. Tighten terminals to manufacturer torque recommendations or use properly sized wire connectors and retest under load to verify stable voltage. For Blythewood, SC homeowners, visible arcing marks or scorch on terminals should prompt an immediate professional assessment.
Misidentifying conductors during multi-conductor installations creates swapped hot and switched-leg connections that lead to unexpected control behavior. Label wires during disassembly and verify with a voltage tester and continuity checks before making new splices or switch connections. Professionals trace travelers and switched legs with a multimeter to confirm which conductor feeds lights or motor controls and document findings. In a common situation, a homeowner in Gilbert, SC found the light stayed on while the fan switched off, a pro traced and corrected a swapped switched-leg connection.
Warning Signs of Faulty Ceiling Fan Wiring to Watch
Buzzing or intermittent power when the fan runs can signal a loose terminal or arcing inside the canopy and should not be ignored. If you notice a faint burning odor when the fan operates, shut the circuit off and avoid using the fan until inspected. A trained electrician will check terminal torque, look for discoloration on conductors, and measure voltage drop under load to confirm a faulty connection.
- Lights flicker while fan stays on.
- Fan stops randomly without tripping a breaker.
- Visible scorch marks near wire nuts or terminals.
- Canopy moves or rotates during operation.
Repeated breaker trips that happen only when the fan or light runs point to an overload or short on that circuit, not always the panel. A professional will isolate the fan circuit, test current draw with the fan at each speed, and identify whether capacitors or motor windings draw excess current. Look for inconsistent control behavior, such as a wall switch only working on certain speeds, which might indicate a poor switch contact or shared neutral issue.
Loose grounding or missing ground continuity creates higher shock risk and may show as the metal parts of the fan sparking or tingling when touched. An electrician confirms grounding with a continuity tester between the fan canopy and the service panel grounding conductor, and they will inspect bonding at the fan-rated box. If you see corrosion on grounding connections or paint isolating metal parts, treat it as a warning sign until a pro confirms grounding integrity. Timely action reduces shock hazards and prevents code violations during later inspections.
Unusual vibration that worsens after short use and shows paint chips or ceiling cracks near the mount suggests hidden support or wiring fatigue that could lead to a falling fixture. A technician will remove the canopy, inspect hanger hardware, and check for conductor abrasion or insulation wear caused by motion. Record any unusual sounds or timing of symptoms to help the diagnostician reproduce the issue during inspection and testing. If you suspect imminent mechanical failure, stop using the fan and arrange a professional ceiling fan wiring and support inspection right away.
When to Call a Professional for Ceiling Fan Wiring
If wiring shows signs of overheating, buzzing, or intermittent power during routine checks, hire a licensed electrician to prevent escalation. A professional will shut down the circuit, remove the canopy, and inspect terminal connections for heat damage and loose conductors. They will also test continuity and measure voltage drop under load to identify hidden defects. Prompt intervention reduces the chance of component failure or fire.
Call when mechanical support questions coincide with electrical concerns, such as when the fan moves despite tight mounting screws. A technician evaluates the hanger, brace, and box while checking for conductor abrasion where parts rotate or rub. They can perform a tug and vibration test, inspect insulation under the canopy, and recommend reinforcement tied to the ceiling structure. Combining mechanical and electrical fixes avoids repeat service visits.
Request service if multiway switches behave unpredictably or if adding new controls seems complex beyond homeowner skills. An electrician traces switched legs, confirms proper traveler assignment, and verifies the neutral is not shared incorrectly between circuits. They may suggest installing a compatible fan control module to simplify wiring and reduce live conductors in remote switches. Accurate tracing prevents swapped functions and unsafe switch wiring.
If you detect a burning smell, visible scorch marks, or frequent trips tied to the fan circuit, schedule immediate professional assessment rather than delaying repairs. The technician documents test readings, records photos, and provides a repair plan with prioritized actions for safety. Homeowners in Blythewood, SC and Gilbert, SC benefit from written findings to discuss options with property managers or insurers. Quick professional diagnosis protects occupants and property while restoring safe operation.